Several years ago now, I wrote an article about my Sublime Text config for editing MediaWiki. While that article does do a good job of covering what I recommend doing in Sublime Text, it doesn’t begin to tell you how. So here’s a step-by-step tutorial of how to install Sublime Text and edit your first page in Mediawiker.
Do I have to spend money on Sublime Text?
No, you can do everything in this guide for free!
People have often cited Sublime Text’s cost as a reason they don’t want to use Mediawiker, but Sublime is like WinRAR - it asks you to pay for it but it never demands that you do. And in fact, Sublime’s prompts to buy the “full version” (which is identical to the trial version except it never asks you to buy it again) only happen when you save a file locally. And with Mediawiker, you never save files locally, so you get exactly the same experience with the free version as you do with the full one!
That said, if you find yourself using Sublime constantly & are financially able to, I do recommend buying the version to support development of the software. The screenshots in this document all say “UNREGISTERED” in the window title, but that’s because I’m using a portable install to write this guide; my “real” install is registered.
Install and configure Sublime Text
- Go to the download page. Note: If you Google “Sublime text install” you may get an older release, Sublime Text 3. Make sure you get the most recent version, which I’ve linked to here.1
- Download the version for your OS. If you are on Windows and ever want to try messing around with config without affecting your install, you can additionally grab the portable installation, which gives you a zip you can extract to some folder and run the program from there without installing it. That’s what I’m using to write this guide.
- Run the installer and open Sublime Text.
- Press
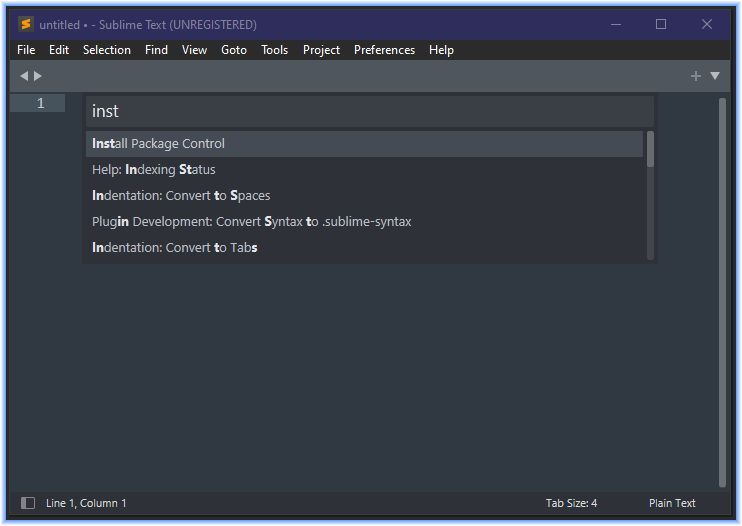
Ctrl+Shift+Pon Windows orCmd+Shift+Pon Mac. This will open your Command Palette, the place where you go to do most things. - Type
inst& pressEnteron the first option, “Install Package Control”.
- Press OK when it’s done.
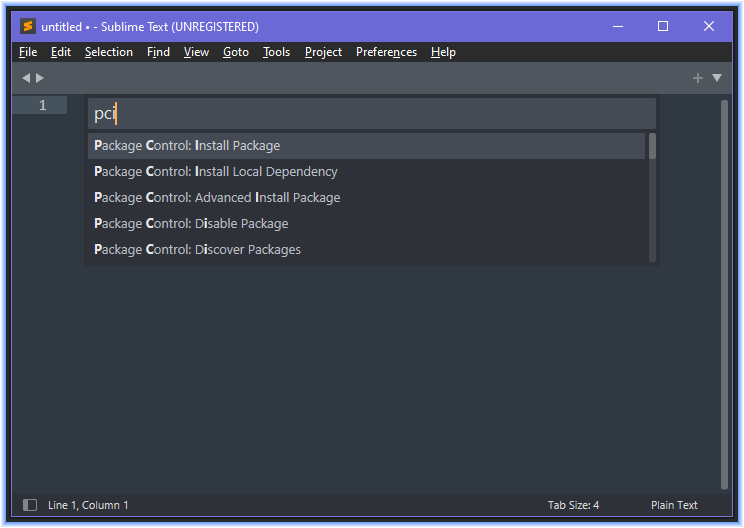
- From now on, whenever you want to install a new package, such as Mediawiker, you’ll want to type
Ctrl+Shift+Pand thenPCIfor “Package Control: Install Package”.
Install Mediawiker
Normal install (recommended for most users)
- Type
Ctrl+Shift+Pand thenPCIto get to the “install packages” interface.
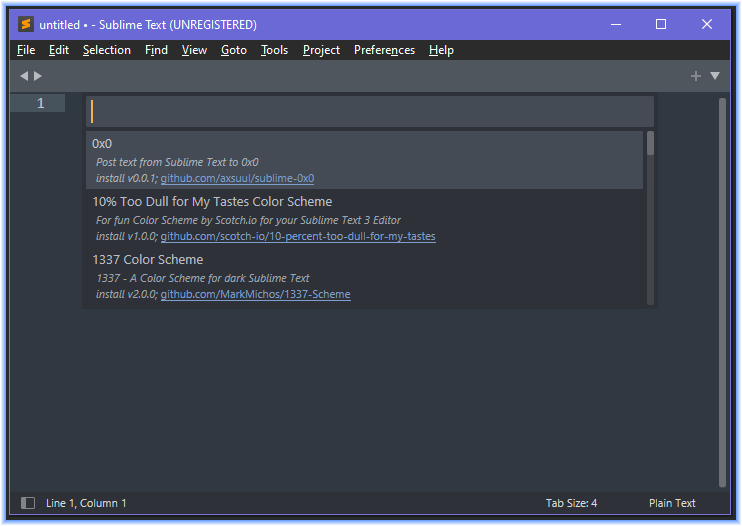
- Type
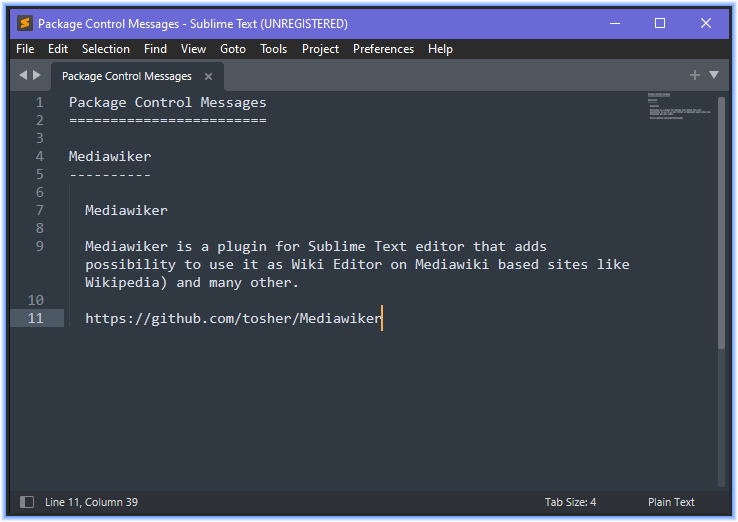
mediawand press enter.
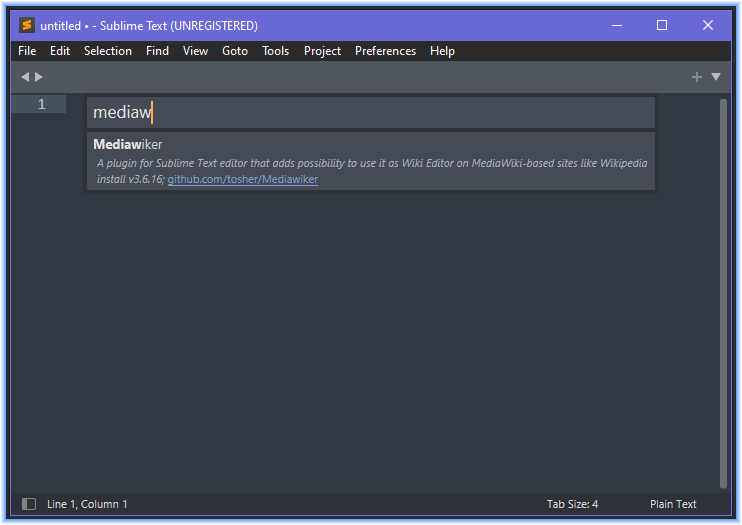
- You should now see a screen that looks like this:
Git install (not generally recommended)
I manage my Mediawiker install myself via Git, but I don’t recommend it for most people. If you install with Git, you don’t get the benefit of Package Control managing your extension, so you won’t get automatic updates, and you’ll have to manage updating yourself. The only reason to do a Git install is if you are likely to make local changes to Mediawiker in a branch.
Here’s how to do it:
- Find where your packages are installed. In Windows this is
C:\Users\River\AppData\Roaming\Sublime Text 3\Packages(replace “River” with your user name).- Note, some packages install to
\Sublime Text 3\Installed Packagesdepending on how they’re distributed. You want the\Packagesfolder. - Also note, when Sublime released Sublime Text 4, which is now just “Sublime Text,” they kept the same AppData folder name, so it will say
Sublime Text 3even though 3 is an old version now.2
- Note, some packages install to
- Open a command window there, ideally Git BASH if you are on Windows.
- Run
git clone https://github.com/tosher/Mediawiker. - Done! You may need to restart Sublime Text.
Configure Mediawiker
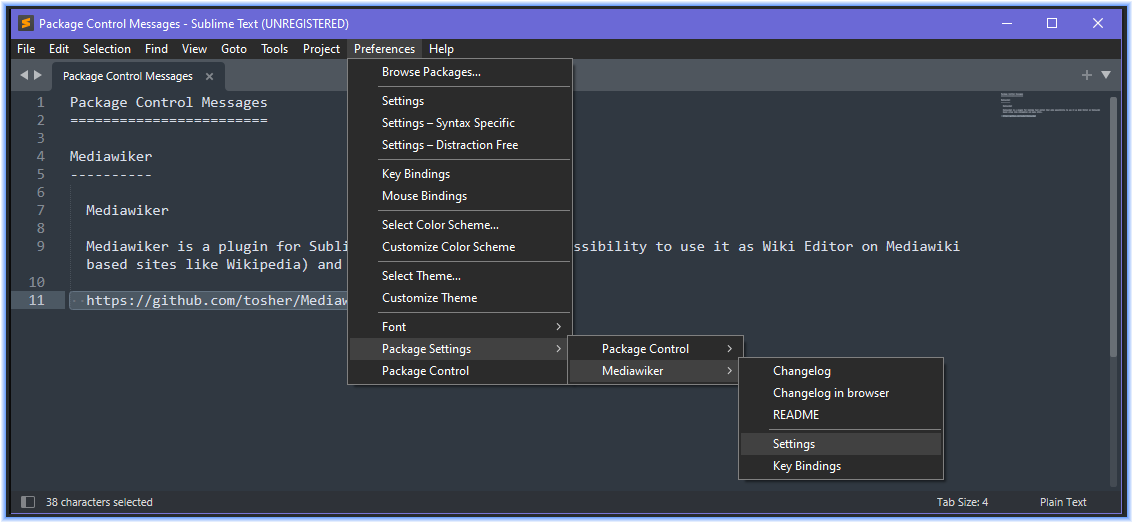
- Go to Preferences -> Package Settings -> Mediawiker and click “Settings.”
- You should get a window that looks like this:
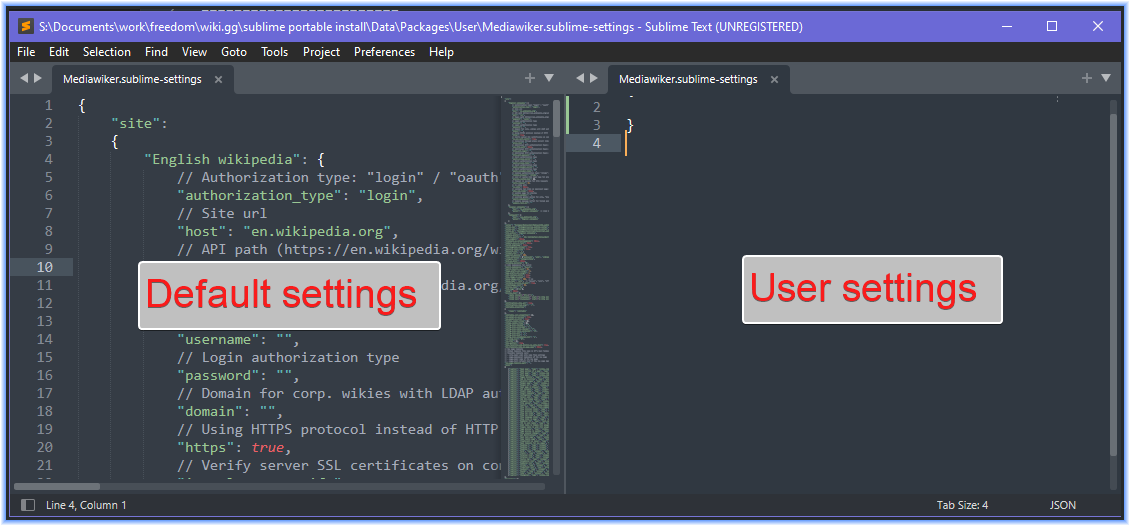
- Copy everything from the default settings side to the user settings side.
- Anything on the right-hand side (User settings) will take precedence over anything on the left-hand side (Default settings). If you only plan to change 1 or 2 settings, you can copy only part of Default settings to User settings; but with Mediawiker you’re likely to change many things, so copying the entire file is helpful.
- We’ll now configure the site list. If you are planning to edit Wikimedia projects, where your login is the same as your Wikipedia login, then you should fill out the
English wikipediasection and then make more configs with that one as the parent, like so:1 2 3 4"Russian wikipedia": { "host": "ru.wikipedia.org", "parent": "English wikipedia" // link to parent site }, - If you’re not editing Wikimedia wikis, then you’ll want to configure for your own wiki or wiki farm. Here is how my config looks for wiki.gg wikis. I recommend copy-pasting this into your settings file and then updating for the wikis you plan to edit, but keep
support.wiki.ggas the “parent” wiki.1 2 3 4 5 6 7 8 9 10 11 12 13 14 15 16 17 18 19 20 21 22 23 24 25 26 27 28 29 30 31 32 33 34 35"site": { "support": { "authorization_type": "login", "cookies_browser": "chrome", "domain": "", "host": "support.wiki.gg", "http_auth_login": "", "http_auth_password": "", "https": true, "is_ssl_cert_verify": true, "is_wikia": false, "oauth_access_secret": "", "oauth_access_token": "", "oauth_consumer_secret": "", "oauth_consumer_token": "", "pagepath": "/", "password": "REPLACE_THIS_WITH_YOUR_BOT_PASSWORD_TOKEN", // change this "path": "/", "preview_custom_head": [ ], "proxy_host": "", "retry_timeout": 30, "show_red_links": false, "summary_fail_buf": "", "use_http_auth": false, "username": "RheingoldRiver@SublimeText", // change this }, "neutronized": { // change the name "host": "neutronized.wiki.gg", // change this "parent": "support" }, }, - We’ll now make our bot password. Go to Special:BotPasswords on your wiki and log in.
- Create a new bot password called “SublimeText.” If you call your password something else, you’ll have to edit after the
@symbol in theusernamefield above.

- Give it the rights you need. Do not give it “High-volume editing,” see my article on bot passwords for some recommendations about separating permissions when creating bot passwords. Remember you can always edit these grants later; so you may want to grant only “Edit existing pages” and “Create, edit, and move pages” until you are comfortable using Mediawiker.
- Scroll to the bottom of the page and click “Create.”
- Copy the token it gives you. If you lose this, you’ll have to regenerate the password so you may want to stay on this screen for a bit.
- Paste that token into the
passwordfield in the settings, and change theusernamefrom where it says “RheingoldRiver” to your own user name.
Optional: Configure your hotkeys
If you want, you can customize the default Mediawiker keybinds. Here are the ones I use:
|
|
Go to Preferences -> Key Bindings and paste these in on the right-hand side of the key bindings file if you want.
For the remainder of this document I’ll pretend you have no keybinds at all, so that regardless of how you’ve customized, you can follow along, but I highly recommend using bindings.
Save your first edit
- Press
Ctrl+Shift+Pand then typewiki. Press enter.
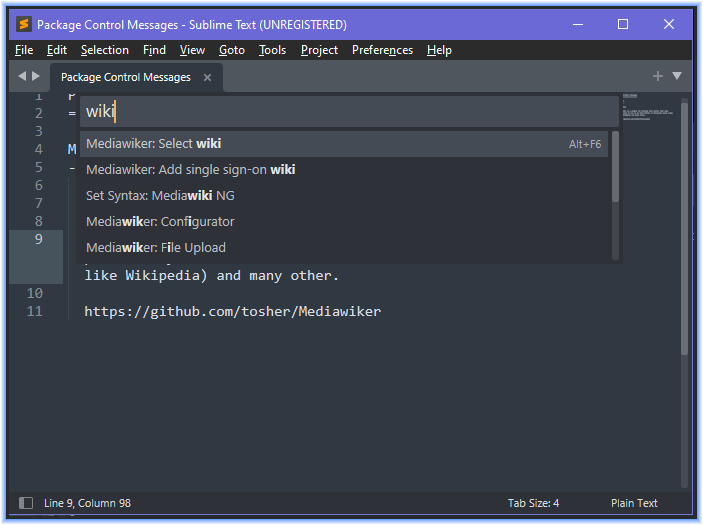
- Press up or down arrow and select the wiki you want. Press enter.
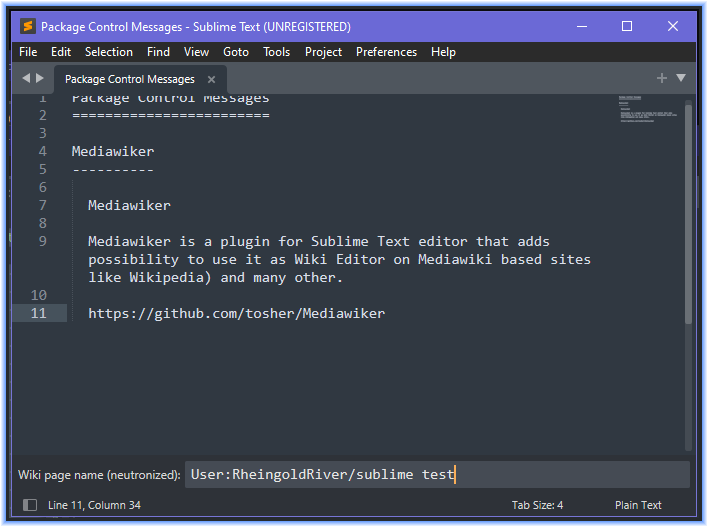
- Press
Ctrl+Shift+Pand then typeopen. Press enter.

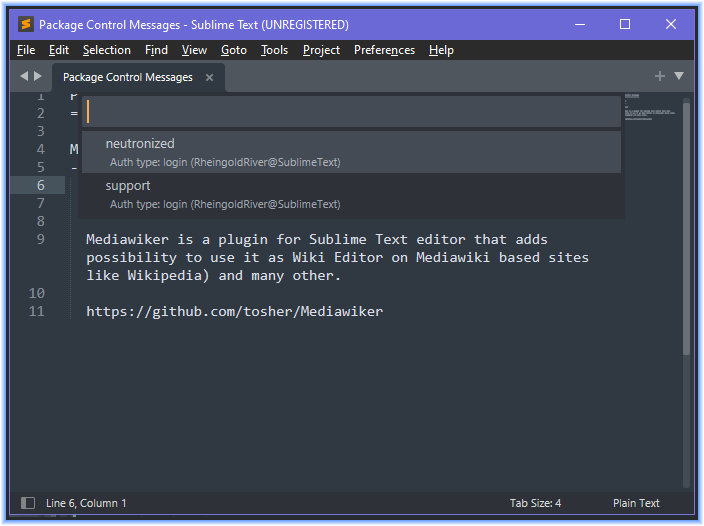
- Open a page for editing. I’m going to make a sandbox page for this tutorial.
- Your window should now look something like this:

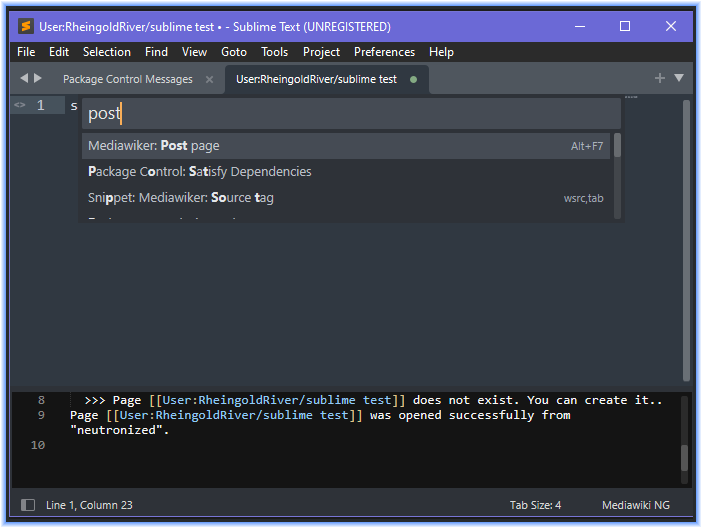
- Type anything you like.
- Press
Ctrl+Shift+Pand then typepost(for “Mediawiker - Post page”) (if you are using my keybinds above, you can do this withCtrl+S). Press enter.
- Type a summary for your edit. Press enter.
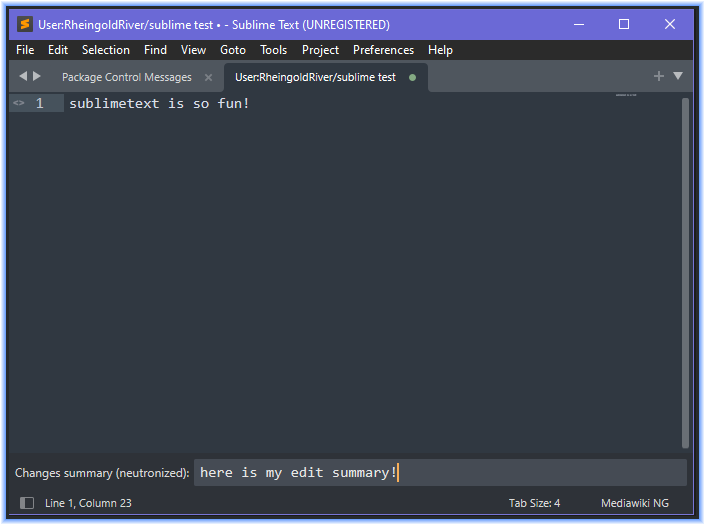
- Go to Recent Changes. Your edit should show up now!

- To dismiss the console you can press
Escinside of Sublime Text.
Yay! What next?
Now that you know how to edit pages in Mediawiker, I recommend taking some time to customize your IDE. Here are a couple recommended changes:
- Create a customized default text to populate new wiki pages. Save this at
C:\Users\River\AppData\Roaming\Sublime Text 3\Packages\Useror the corresponding location on your computer. Mine is calledwiki_new_page.j2so I have the setting"new_page_template_path": "wiki_new_page.j2",. My current template looks like this:
wiki_new_page.j2{%- if page_namespace == 828 -%} {%- if (page_name|lower).endswith('/doc') -%}{# ----------------------------------------- -------- module documentation --------- ----------------------------------------- #}<includeonly>{{ "{{luadoc}}" }}[[Category:Lua Modules]]</includeonly>{# end ----------------------- #}{%- elif (page_name|lower).endswith('/i18n') -%}{# ----------------------------------------- -------- i18n module --------- ----------------------------------------- #}return { ['en'] = { }, }{# end ----------------------- #}{%- elif (page_name|lower).startswith('module:cargodeclare/') -%}{# ----------------------------------------- -------- Cargo dec module --------- ----------------------------------------- #}return { { field = "", type = "", desc = "" }, }{# end ----------------------- #}{%- elif (page_name|lower).startswith('module:infobox/') -%}{# ----------------------------------------- -------- Infobox module --------- ----------------------------------------- #}local util_args = require('Module:ArgsUtil') local util_cargo = require("Module:CargoUtil") local util_html = require("Module:HtmlUtil") local util_map = require('Module:MapUtil') local util_table = require("Module:TableUtil") local util_text = require("Module:TextUtil") local util_vars = require("Module:VarsUtil") local i18n = require("Module:I18nUtil") local Infobox = require('Module:InfoboxDataClass'):extends() Infobox.LAYOUT = { tabs = nil, sections = {}, contents = { { }, }, classes = {}, } Infobox.type = '' local h = {} local p = {} function p.main(frame) local args = util_args.merge() return Infobox:init(args) end function Infobox:validateArgs(args) end function Infobox:getProcessed(args) local processed = self:super('getProcessed', args) local tbl = { } return util_table.merge(processed, tbl) end function Infobox:getDisplay(args, processed) local display = self:super('getDisplay', args, processed) local tbl = { } return util_table.merge(display, tbl) end function Infobox:getCargo(args, processed) local cargo = self:super('getCargo', args, processed) if util_args.castAsBool(args.nocargo) then return cargo end local tbl = { -- { -- _table = "", -- } } return util_table.mergeArrays(cargo, tbl) end function Infobox:getCategories(args, processed) local categories = self:super('getCategories', args, processed) local tbl = { } return util_table.mergeArrays(categories, tbl) end function Infobox:getVariables(args, processed) local variables = self:super('getVariables', args, processed) local tbl = { } return util_table.merge(variables, tbl) end return p{# end ----------------------- #}{%- elif page_inherit == "EntityAbstract" -%}{# ----------------------------------------- -------- EntityAbstract --------- ----------------------------------------- #}local util_vars = require("Module:VarsUtil") local p = require('Module:EntityAbstract'):extends() local h = {} p.objectType = '' p.imagelength = '' p.defaultlength = '' p.cssClass = '' return p{# end ----------------------- #}{%- elif (page_name).endswith('List') -%}{# ----------------------------------------- -------- EntityList --------- ----------------------------------------- #}local EntityListAbstract = require('Module:EntityListAbstract') local p = EntityListAbstract:extends() p.Entity = require('Module:{{ page_name.replace('Module:', '').replace('List', '') }}') return p{# end ----------------------- #}{% else -%}{# ----------------------------------------- -------- normal module --------- ----------------------------------------- #}local util_args = require('Module:ArgsUtil') local util_cargo = require("Module:CargoUtil") local util_html = require("Module:HtmlUtil") local util_map = require('Module:MapUtil') local util_table = require("Module:TableUtil") local util_text = require("Module:TextUtil") local util_vars = require("Module:VarsUtil") local i18n = require("Module:I18nUtil") local lang = mw.getLanguage('en') local h = {} local p = {} function p.main(frame) local args = util_args.merge() i18n.init('{{ page_name | replace('Module:', '') }}') end return p{# end ----------------------- #}{% endif %} {%- elif page_namespace == 106 -%}{# ----------------------------------------- -------- form page --------- ----------------------------------------- #}{{ "{" }}{{ "{" }}{{ "{" }}for template|{{ "}" }}{{ "}" }}{{ "}" }} {{ "{" }}{{ "{" }}{{ "{" }}end template{{ "}" }}{{ "}" }}{{ "}" }} {{ "{" }}{{ "{" }}{{ "{" }}standard input|run query{{ "}" }}{{ "}" }}{{ "}" }}[[Category:Query Forms]]{# end #}{%- elif (page_name|lower).endswith('/js') -%}{# ----------------------------------------- -------- js page --------- ----------------------------------------- #}$(function() { });{# end ----------------------- #}{% else -%}{# NOTE: default text #}{{ page_text }}{# end ----------------------- #}{% endif %} - Add and configure any of the extensions in my config article that sound interesting to you.
- Read through the entire default keymap file (Preferences -> Keymap) and change anything that interests you.
-
Sublime used to have separate major releases, e.g. Sublime Text 3 was an entirely new release, not an update to Sublime Text 2. With Sublime Text 4, they abandoned this system in favor of having incremental updates to the program now known simply as “Sublime Text.” They also completely redid all their documentation at this time, and Google has not been great about showing you the newest version. ↩︎
-
We are all very happy they made this decision, because it meant nearly all packages “just worked” with the transition from 3 to 4. ↩︎